How to Create a Custom Coloring Book
Are you looking for a unique way to capture memories, enjoy them in new ways, and share them with family and friends in a way that will last? We all have growing collections of digital photographs that we're accumulating, so why not turn those photos into something new? FotoMedley helps you convert your photos into custom coloring pages, and even to get them organized and printed as custom coloring books.
This tutorial will walk through how to plan, create, customize, and have published an entire coloring book!
1. Starting Your Project
First, we'll get started by entering the FotoMedley coloring book designer, which can be accessed from the home page.
It's a good idea to give you project a name, in case you want to have more than one.
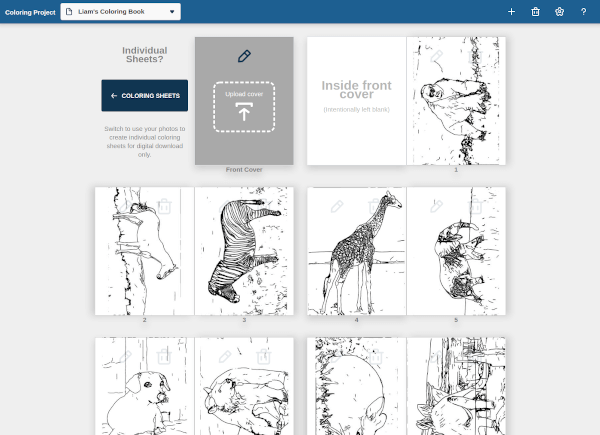
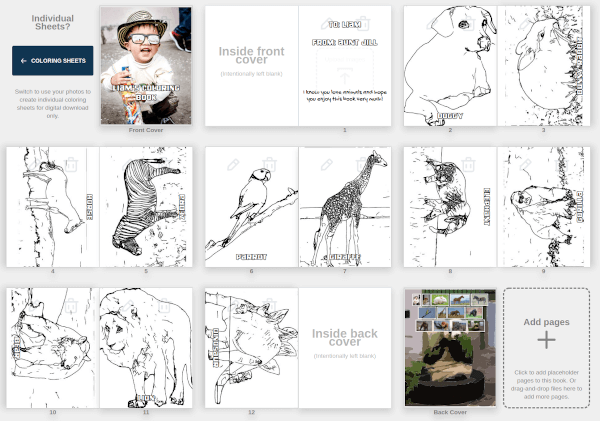
Now that you're in the designer to do a full coloring book, your layout should show placeholders for a front cover, 12 inside pages that you can upload you photos into, and a back cover.
Next we'll think about how to organize our coloring book.
2. Planning Your Coloring Book
You have a minimum of 12 pages that you can fill in you custom coloring book. Before you get started uploading photographs, you might consider who the book is for or what the theme might be. Here are some ideas:
- Family - Maybe you want to have 1 or 2 pages for each person in your immediate or extended family.
- Pets - Choose to include your special pets past or present and always remember them.
- Trips - Perhaps you have a favorite trip that you'd like to remember by including landmark, selfies, and such.
- Events - Holidays, weddings, birthdays, graduation, or any number of special events might make a good theme.
- Topic - A category like animals, cars, toys, might be fun.
- Story - You might event want to organize your photos to tell a story, as FotoMedley let's you include text content on the pages.
For our example, we're going to create a special coloring book for our nephew Liam. He really likes animals, so we're going to use some nice animal photos and make a book for him.
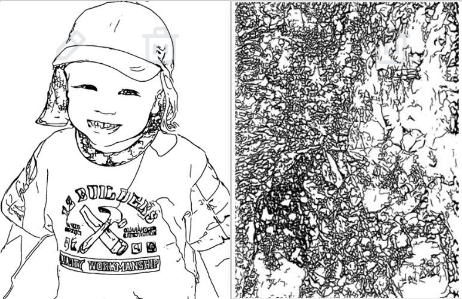
Keep in mind that not all photos will turn out to be good for coloring. Photos with good contrast and lighting and clear people or objects tend to have the best results — on the other hand, photos of landscapes, plants, low resolution, blurry images, or things that otherwise don't have clear edges might not look great.
For example, one of these images will work pretty well as a coloring page, and the other won't. See if you can guess which?
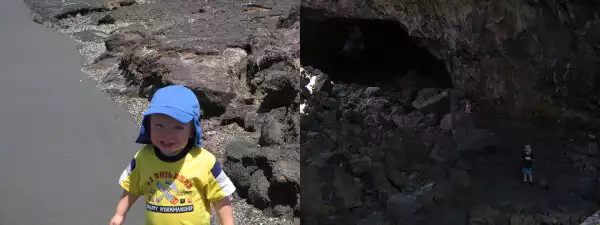
In case you couldn't guess, here are the results of uploading them:
So, once we've got a good idea of that photos we want to include, let's move on to the process of uploading the photos into our book.
3. Uploading Your Images
You can upload the photo by drag-and-drop onto the "Upload image" area, or just click on it to browse for you image to upload.
When your image is uploaded, it'll take a couple minutes to process. It takes a some time because, under the hood, FotoMedley performs artificial intelligence algorithms which convert the images into coloring pages. Not all images turn out great, but a lot of times, the results will be excellent. While you're waiting for one image to process, go ahead and upload your additional images as well — they'll be processed in parallel so it'll save you a lot of time overall.
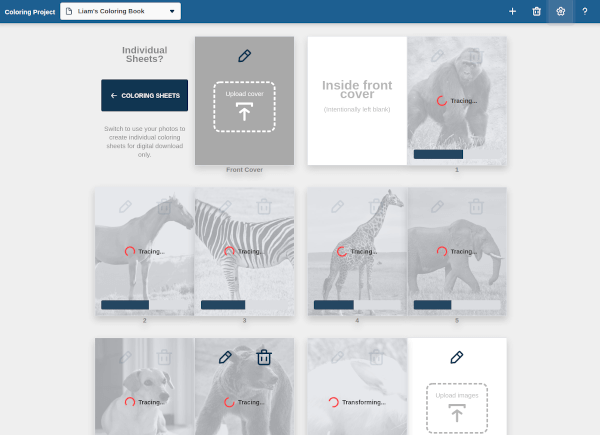
And just like that, we've added a bunch of coloring pages to our book. You might notice that many of the images ended up in a landscape page layout. When the coloring book is printed, those images will be oriented so that the top of the image is in the middle of the book — that way it'll be in a good position for coloring when you rotate the book.
You might think that it looks pretty good now, and that's it, but we want the best results, so we're going to do a little further customization of the pages next.
4. Customizing Your Pages
Now would be a good time to point out that you have the option of changing image processing settings if you're interested in exploring the widest variety of results for your images. For our purposes in this tutorial, we're going to keep the original processing settings, but we might tweak our image layout selections.
For any page, after we've uploaded and initially processed an image, we can customize it further by using the "pencil" icon on the page itself to bring up the "Edit Page" dialog. We have the option to change the page layout and reprocess the image, as well as add text content to the page.
Image Layouts
Looking through our images, we found the upload of a "lion" doesn't look fantastic, so we're going to see what other layout options are available by opening the "Edit Page" dialog.
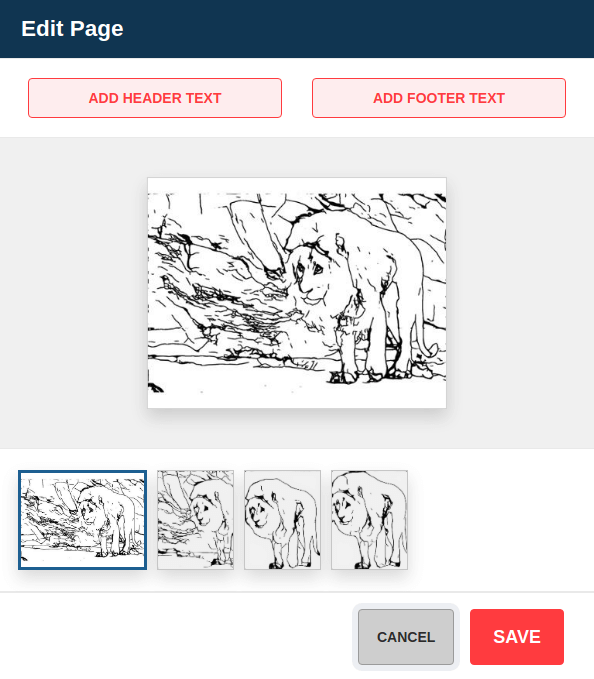
Notice that we have several image layouts to choose from; some of them are portrait oriented, some are landscape; some include the background and some have it removed. The image layouts that are available will be dependent on the image you upload. In this case, we like look of the 3rd option, so we'll select it and click "SAVE". We'll have to wait a minute or two for the new layout to be processed, but if we want, we can edit other images while that's going on.
Now is a good time to look at all of our images and explore tweaking the layouts to see if there are any alternatives that look better. We're going to edit the "dog" and "dinosaur" images to try a layout that removes the background from each, and change a "parrot" image to fill out the page a bit better.
Here's how they look after out changes:
The first time you use FotoMedley, you'll be prompted to select an image style that you like. Have a look at our guide on setting if you'd like to learn more about those options. For this tutorial, we'll be using the bottom-left option, which is a simple coloring style that tries to maximize white-space for coloring and includes the background content in the image.
Reordering Pages
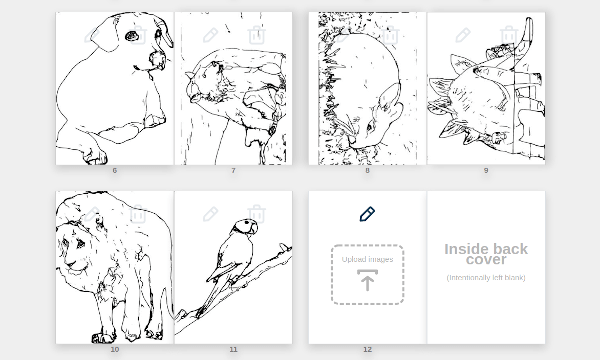
If you don't like the order of your images, take some time to drag-and-drop their placement to reorder them. We're going to move the "Upload images" placeholder at the end of our book to the first page of the book because we're going to put a little dedication message there. Putting the "zebra" and "horse" images adjacent to each other seems like a nice idea, so we'll move those. The "dinosaur" isn't a living creature today, so we'll make it a surprise at the end of the book. And maybe we want the scariest animals toward the end too.
Only you know what order will be the best for you images, so take some time to get that right.
Note that as of the time of this writing, drag-and-drop reordering of pages isn't available if you're editing your book on a touch-screen device.
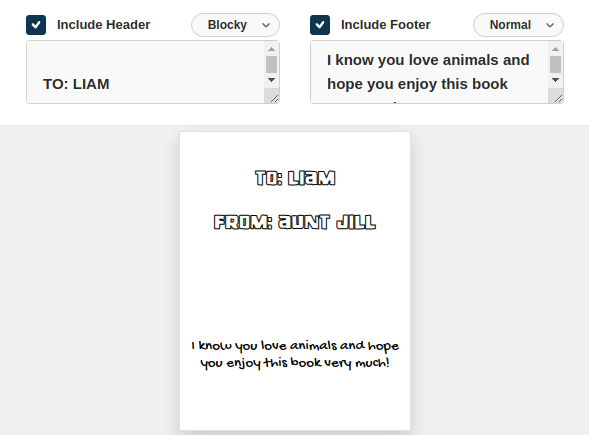
Adding Text
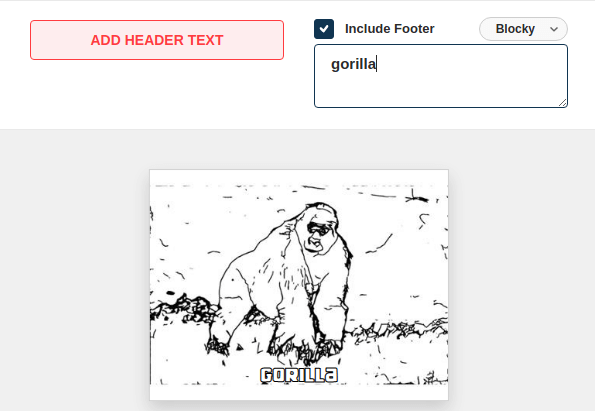
Our nephew, Liam, is also very interested in learning the alphabet and reading, so this is a great opportunity to add so words to our book as well. From the "Edit Page" dialog, we have the option of adding text to the top or bottom (or both) on each page.
The header and footer text and be either a blocky font that is good to be colored in, or a plain font that like kind of like handwriting.
We're going to label all of our animal pages now.
Notice that as we're editing the text, we can see a preview of how it'll look on the page.
So, in our book, we only uploaded 11 images and still have 1 page that's empty. We moved it to the front of our book and we can actually click on the "pencil" icon to open the "Edit Page" dialog even if there's no image. We're going to use that page to put a little dedication in.
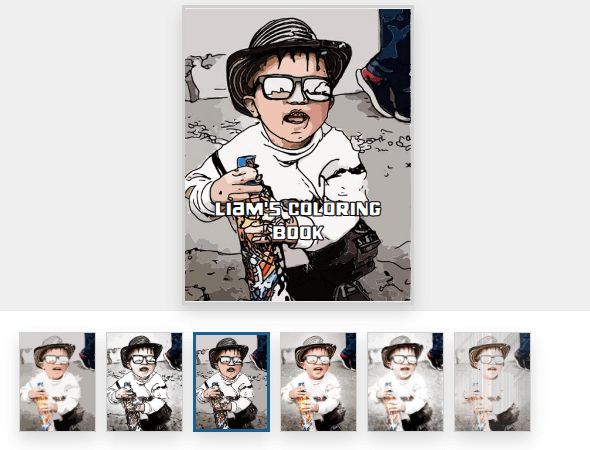
Uploading Cover Images
We almost forgot that no book is complete without a front and back cover! Unlike all of the inside pages, the cover is not meant to be colored, and it'll be printed in full-color when the coloring book is published, so we can upload any image we want. We upload the covers in the same way we upload into the other page placeholders — drag-and-drop files or click to open the upload dialog.
On the front cover, let's upload a picture of Liam.
And on the back, we'll upload another animal.
A few things to keep in mind — the back cover will automatically be filled with little thumbnails of all of the photos you included in this project, you can still add header and footer text to the covers, and the image processing provides several styles you can choose from in the "Edit Page" dialog for the covers.
So, we add a title to the cover, and select the cover style we want. Here's a quick look at the kind of options available. We're just going to select the plain photo version for our book.
Let's see what the completed project looks like now:
We've uploaded images, selected our preferred layout, reordered pages, added text, and covers, and we're ready to order our coloring book next!
5. Ordering Your Custom Printed Coloring Book
In the top-right corner of the page, just click on the "ORDER" button to proceed through the checkout process. Your order will include 1 printed copy of the coloring book by default, but if you want more copies, or to add digital downloads of all of your coloring pages, you may add those to your order.
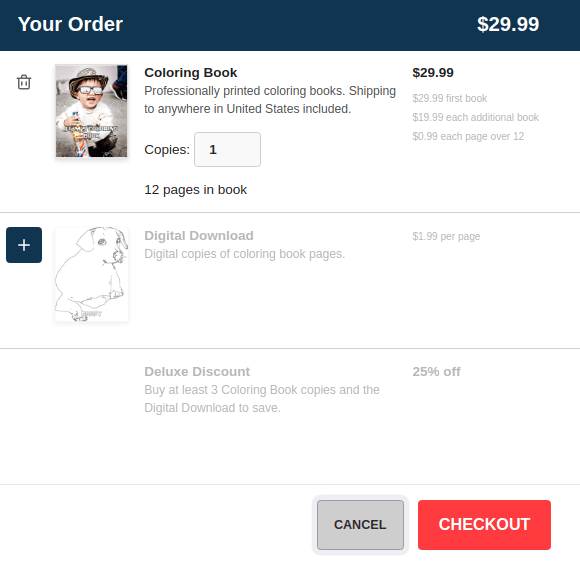
After completing the checkout process, we'll contact you when your order is processed and shipped. Expect about 2 weeks before receiving your printed coloring book(s). If you included the digital downloads, you'll immediately be able to download your printable PDF coloring pages.
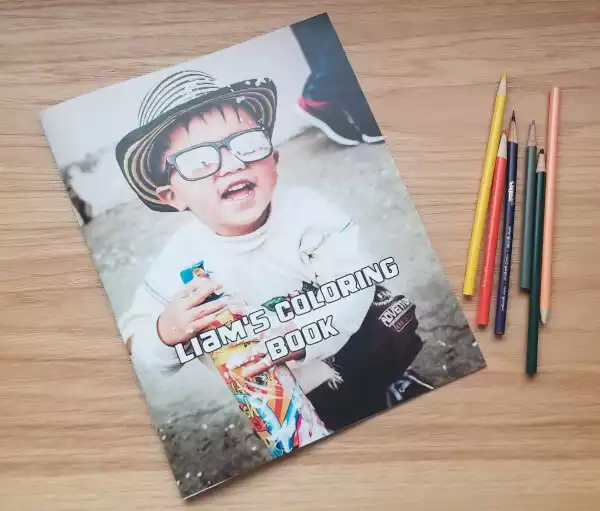
Here's what our final book looks like:
We hope this gives you a good idea of what's possible with FotoMedley. Have fun and enjoy coloring!