How to Use FotoMedley's Image Processing Options
Are you looking for some new effects to use on your photos? FotoMedley's coloring page designer offers several image processing options and allows you to choose your favorite rendering of your upload. Knowing how to use it will help you perfect your results, or do something a little different and interesting.
This tutorial will walk through an explanation of the different image processing options, how to apply them to uploaded photo, and taking an upload all the way through to printed and colored completion!
1. Introducing Image Processing Options
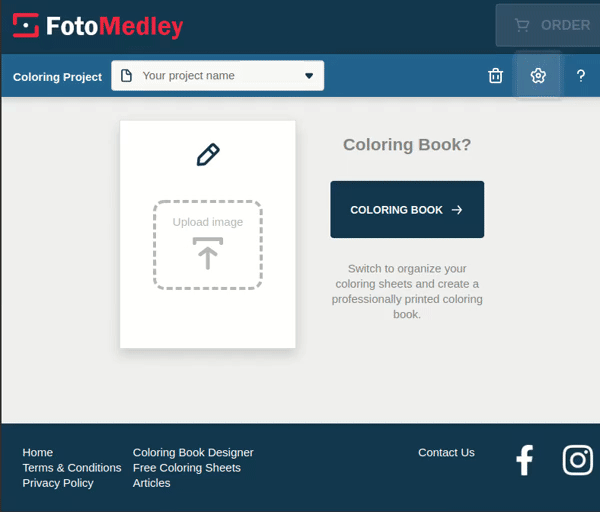
To get started, by go to the FotoMedley coloring page designer, which can be accessed from the home page.
The first time you use FotoMedley, you'll be prompted to select an image style that you like. By selecting a preferred image, you're actually configuring your image processing options. Choose an initial style if you haven't already, and we'll discuss how to change your settings.
To see the available options, we're going to click on the "gear" icon in the toolbar to open available image processing settings.

Clicking on the settings icon will open up the "Processing Settings" dialog, where you can select from several styles, and processing behaviors.
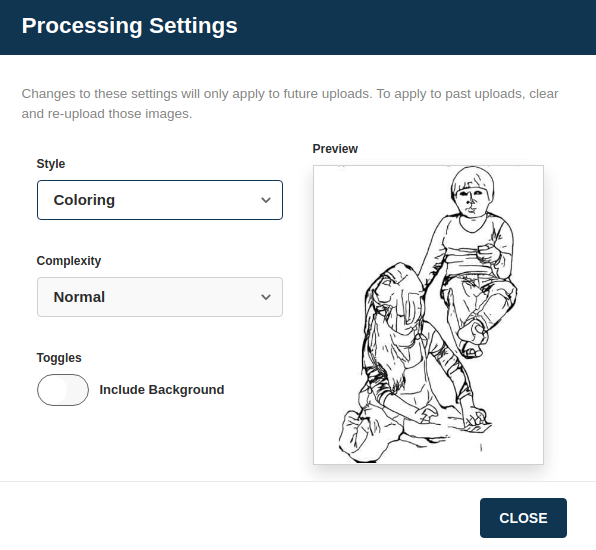
Style — The image processing "style" controls which algorithms will be used to convert the photograph into a coloring page sketch. The available styles are these:
- Coloring — a coloring page style which emphasizes producing bold lines and open white-space so that you can color it in any away you want.
- Texture — a coloring page style which leans toward including additional details in the converted image, looking more realistic as a sketch, but providing less open white-space than the normal Coloring mode.
- Crosshatch — a sketch style which redraws the photograph using an ink crosshatch technique.
- Sharpie — a sketch style which redraws the photograph using dark lines of varying thickness to provide an artistic effect.
Complexity — The processing "complexity" controls the level of detail to use during the image processing. More complexity generally equates to more detail and thinner lines in the resulting image. More complexity also requires more processing power and more time to waite. The available complexities are these:
- Fastest
- Normal
- Slowest
Toggles - Include Background — The image processing will optionally perform a background removal process during the overall processing. After uploading your image, you can actually select between alternative layouts which either include or exclude the background. The use of this toggle simply selects whether the "default" layout will include the background or not.
Changing the Processing Settings
When you change the settings in the dialog, the processing preview example will show you what kind of image processing result to expect. Your changes take effect when you close the dialog.
A big thing to remember when changing the image processing settings is that the changes will take effect only on the NEXT image upload that you perform. If you change the settings after already uploading an image, you will need to upload the same image again after changing your settings to see the result of the new processing options.
2. Uploading Images with Custom Settings
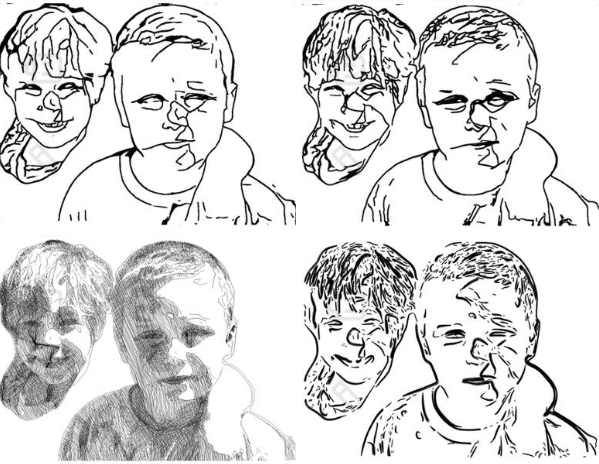
To see how the processing options work, let's upload the same image 4-times, but change the "Style" between each upload. Do it like this — drag the image onto the upload zone, click on the "gear" icon to change the setting, select the next "Style" from the drop-down, and click "Close", then repeat by uploading into the next upload zone, and so on.
Just wait a minute or two for the processing to finish and see what FotoMedley produced. Notice that FotoMedley decided that the best fit for the image would be a landscape page layout. If we rollover the image, it'll rotate the image so we can see what it looks like right-side up. It is nice that among the available alternative layouts will be some portrait layouts we can see.
Selecting Processed Image Layout
Now we've got 4 versions of the same image, each with different processing settings. After we've uploaded and initially processed an image, we can customize it further by changing the processing layout by using the "pencil" icon on the image itself to bring up the "Edit Page" dialog. In this case, we kind of prefer the second image, so we're going to edit that layout and see how it looks.
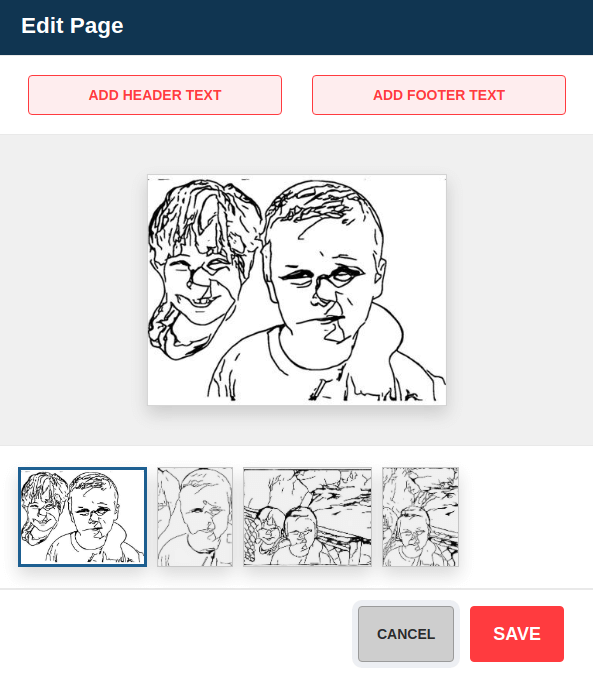
It might be interesting to see how this image looks when we keep the background, so we're going to select the third image in the list, and click "Save" to process it. Since the image processing settings are running on an entirely different image layout, we might have to wait for it to fully process before we can see what it really looks like.

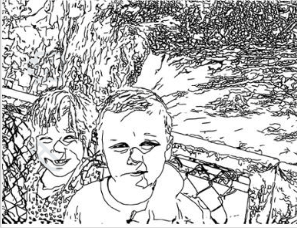
That looks kind of interesting. In this case, we processed the image using the "Fastest" complexity, but maybe it would like better if we switched to the "Slowest" complexity, so let's upload the image one more time, but this time toggle on the "Include background" and change the complexity to slower processing so we can see more detail. Also, remember to check the "Style" at this point, because the next upload will use the active "Style", so we might need to change it to the style we're trying to process again — in this case Texture.
That looks pretty nice for our purposes, so let's proceed to get it printed!
3. Purchase and Print Your Image
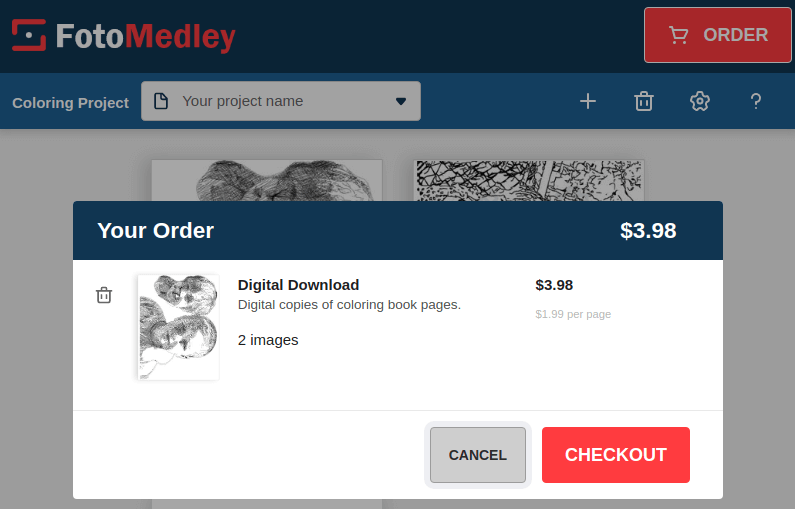
We used a lot of computing power to generate the several versions of our image. To purchase our preferred image, we'll need to remove the images we don't want, and then use the "ORDER" button to purchase a printable version of our image. In our case, we kind of like the Crosshatch image as well, so we're going to use the "trash" icon on the pages we don't want, and remove those. Be careful not to remove an image accidentally.
Here's what we're left with as we get ready to checkout. The order preview only shows the first as a preview, but says "2 images", so we're going to get both of them. After completing the payment process, we'll be able to download our printable PDF.
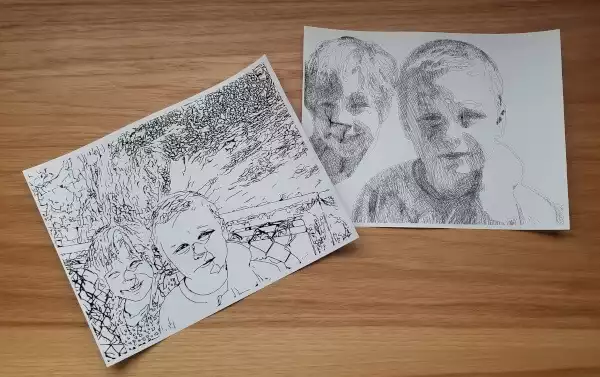
At this point, just download/open the PDF and print it to your local printer. The printable page is suitable for standard 8.5"x11" letter page sizes.
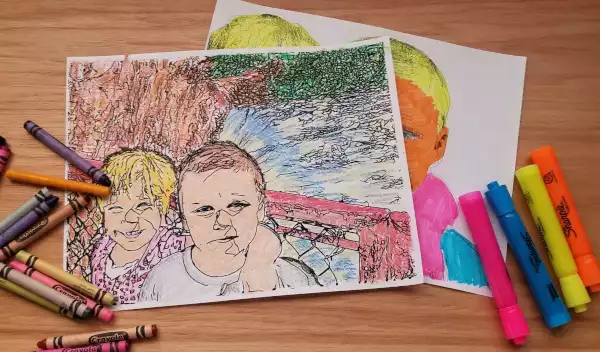
4. Coloring Your Image
Now we can just have fun coloring the pages! We could use markers, pencils, or paint. We could try to use realistic shading, or just solid bold colors. Now is a chance to add our own touch and possibly come up with something that might we love (or maybe we'll want to reprint and start again)!
Here's how this example turned out:
We hope this gives you a quick idea of what's you can do with FotoMedley's image processing options. Have fun and enjoy coloring!